
How to Deploy Your Laravel Project with Forge and DigitalOcean

What better way to start off this blog than to show you what I learned while setting it all up? This post goes over how you can deploy your own Laravel project using Forge with an optional DigitalOcean server at an affordable price.
Laravel Forge
Laravel Forge is a server management and application deployment service provider. Forge eliminates the hassles of deploying servers and can be used to easily launch your next website. Whether your app is built with a framework such as Laravel, Symfony, Statamic, WordPress, or is just a vanilla PHP application - Forge is a viable solution. After connecting to your preferred server provider (we will be using Digital Ocean), Forge will be able to provision new servers for you in minutes.
Forge has a trial period and costs $12 a month after that. Laracasts has a comprehensive and free video course on Forge. For the purposes of this tutorial, we'll be sticking to the basics.
DigitalOcean
"DigitalOcean simplifies cloud computing so builders can spend more time creating software that changes the world."
DigitalOcean is a cloud hosting provider that offers cloud computing services and Infrastructure as a Service (IaaS). While DigitalOcean is an AWS competitor, they are usually preferred for beginners as they offer a simpler approach with affordable plans starting at just $5 a month. DigitalOcean can get you up and running quickly in the cloud.
Forge Setup: Source Control
Once your account is made, you will have some steps to complete on your dashboard. Firstly, you will need to connect your source control provider so Forge knows where to find your application's code. I usually opt for GitHub, but they're all generally the same.
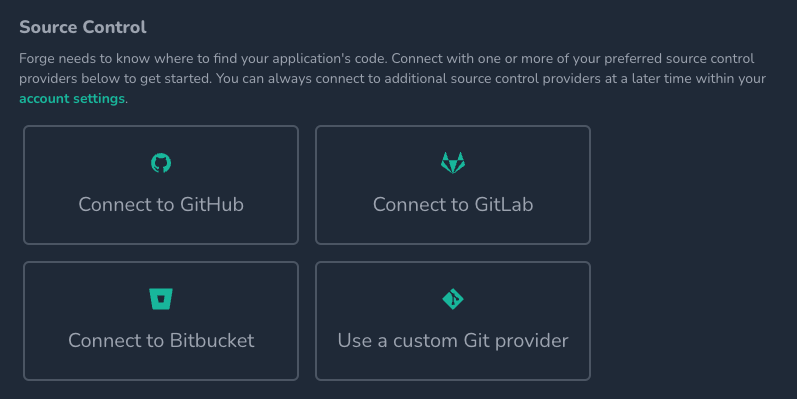
If you skip this step, Forge will later ask you to add a custom SSH key to your source control provider account. To do so, navigate to your provider's settings page and find the area for SSH/GPG keys. Add a new SSH key with an appropriate name like "Forge" and paste in the SSH key that Forge provides.
Forge Setup: Server Provider
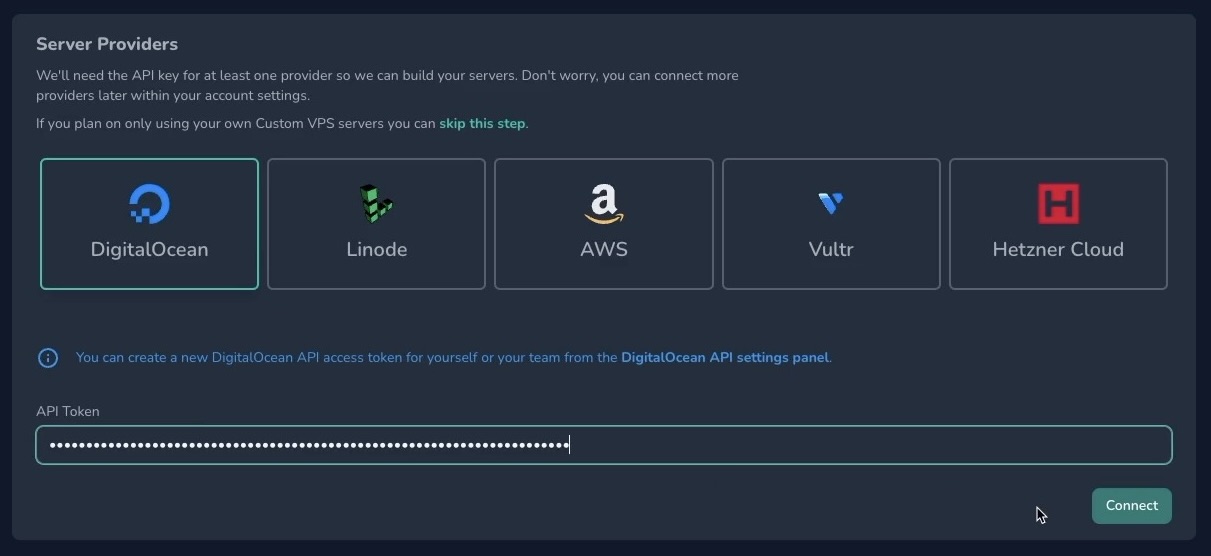
In order to build your servers, Forge requires the API key for at least one server provider. DigitalOcean is a great choice if you're just starting out as the UI is intuitive and the pricing is affordable.
To add your DigitalOcean API Token, head over to your DigitalOcean account and navigate to the API page under the Settings menu area.
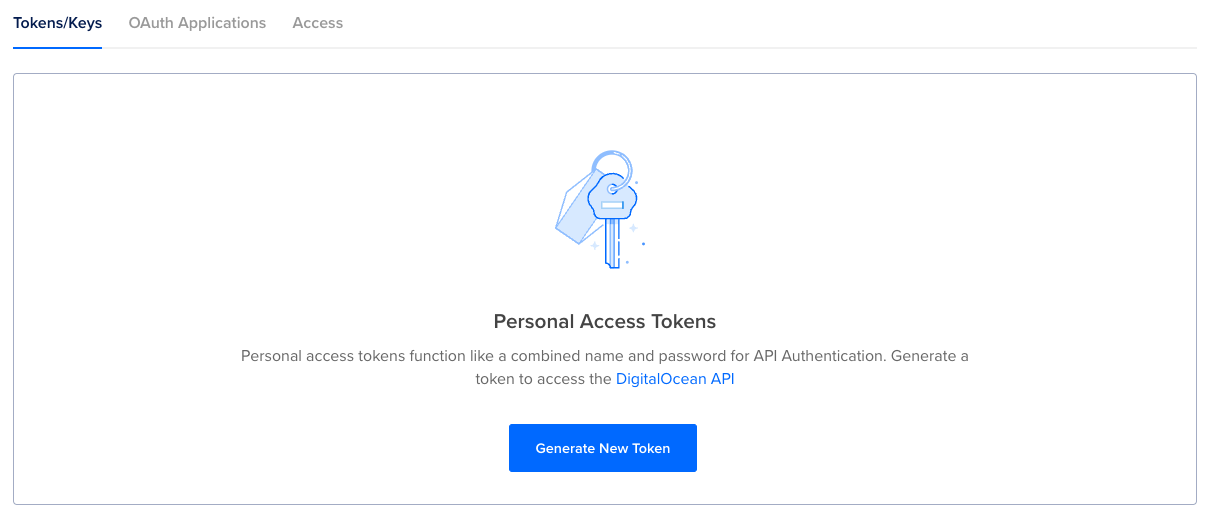
Click the "Generate New Token" button and copy/paste the resulting token to Forge under the Server Providers section and click the "Connect" button.
Forge Setup: Create Server
Once you have a git provider and DigitalOcean connected, you can go ahead and create your first server (called a droplet in the DigitalOcean environment) by clicking the "Create Server" button on the Servers page.
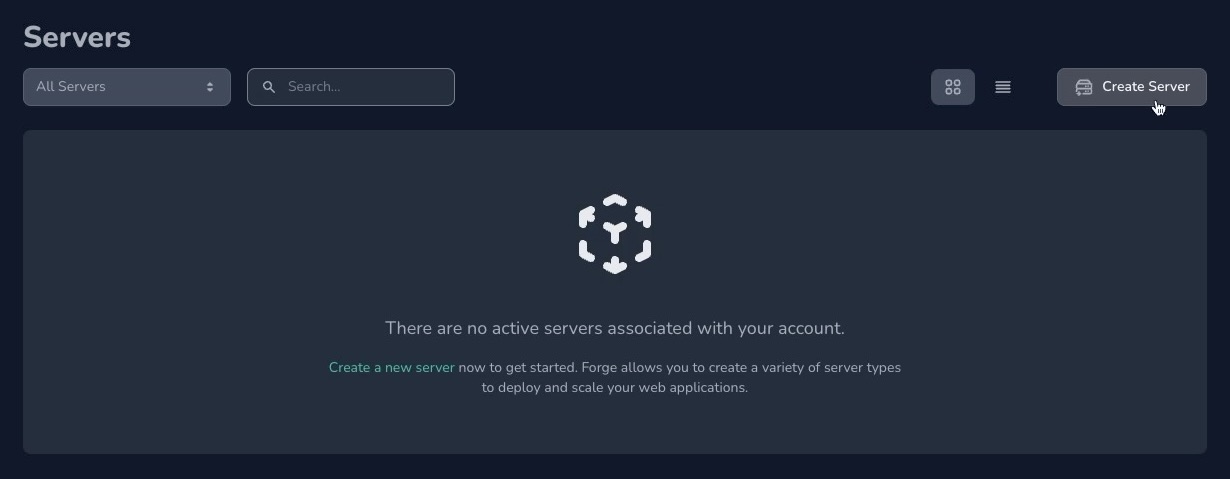
A setup modal should pop up allowing you to configure your server settings. The default settings are fine, but you should consider the server size that you're going to need. If you're just starting out, the smallest available option should be a good starting point - you can increase it later on as required.
My personal server settings:
- Type: App Server
- Name: Pick an appropriate name for your server
- Region: New York
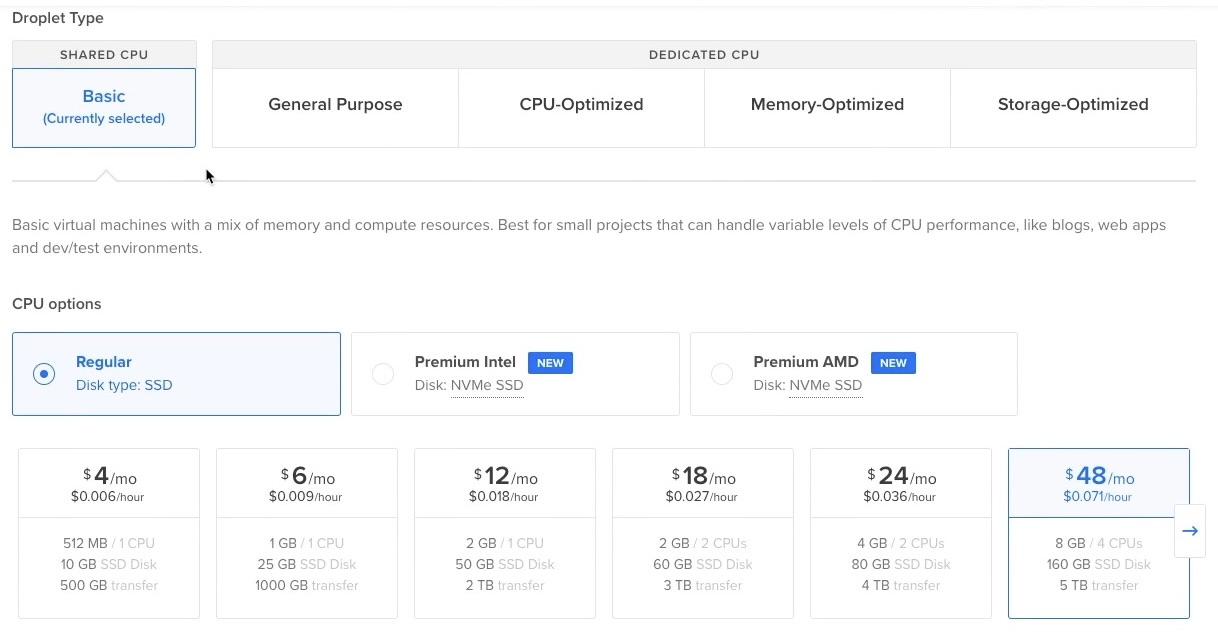
- Server Size: 512MB RAM - 1 CPU Core - 10GB SSD (Smallest option)
- VPC: Create New, empty name
- PHP and Database: Default
- Database Name: forge
Now go ahead and hit the "Create Server" button! While the server is being created, a modal will pop up with your server's credentials. Make sure to store them safetly as we will need them shortly and likely in the future, as well.
Side Note: To compare the available server size options, head over to DigitalOcean, click the "Create" button on the top right and select "Droplets". On this page, you can select different configurations to see what server size is best for you - the cheapest is under New York at $4 a month.
Forge Setup: Create Site
Once your server is created, you will land on a server dashboard - navigate to the "Sites" menu item to configure your server. If you're just testing out the flow, I suggest using the existing "Default" site so you can access it directly with the public IP. If you want to create a new site with a custom root domain, you will not be able to access the website until your DNS and networking is complete. Other than the site's root domain, the default settings are good to go.
At this point, you should be on a page that looks like this:
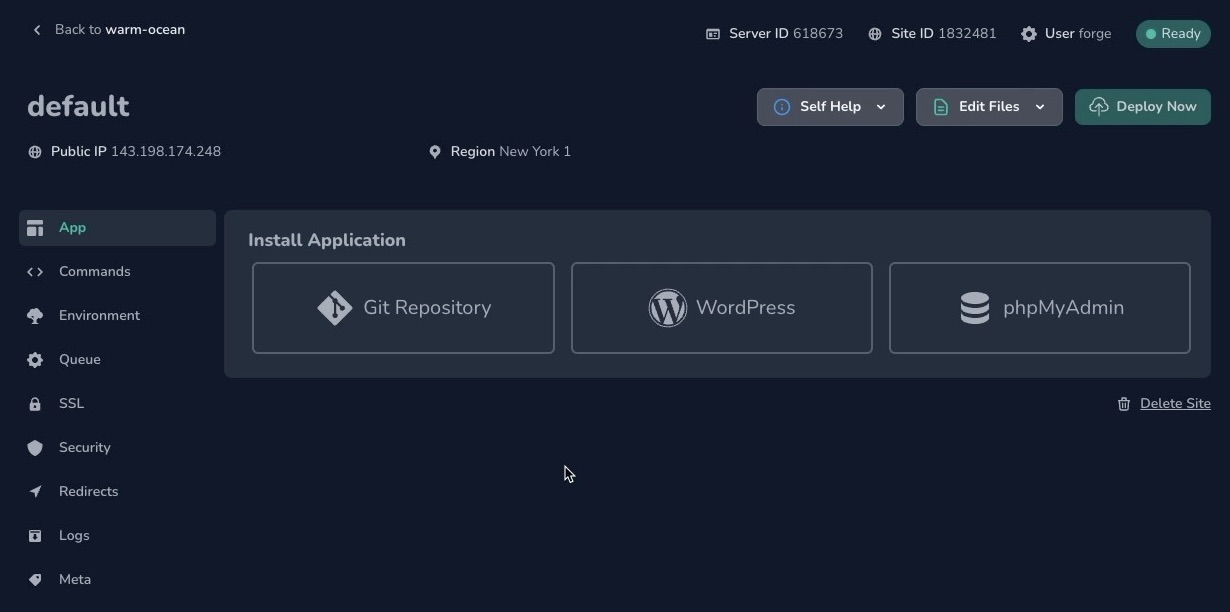
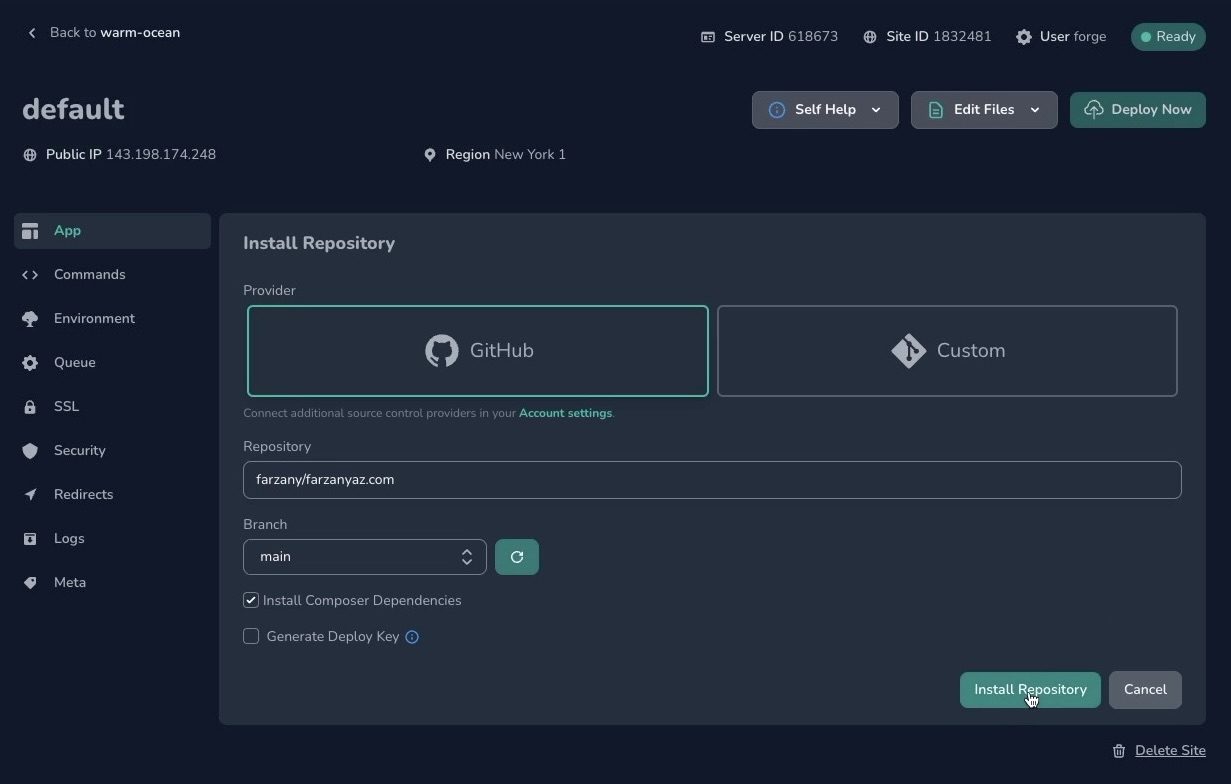
From here, go ahead and install your application - I used my personal website's git repository. If you connected a git provider in the early stages, you can install your repository like the following. Otherwise, you will need to do a custom install where you add the given SSH key to your provider's account.
Forge Setup: Deploy Script Additions
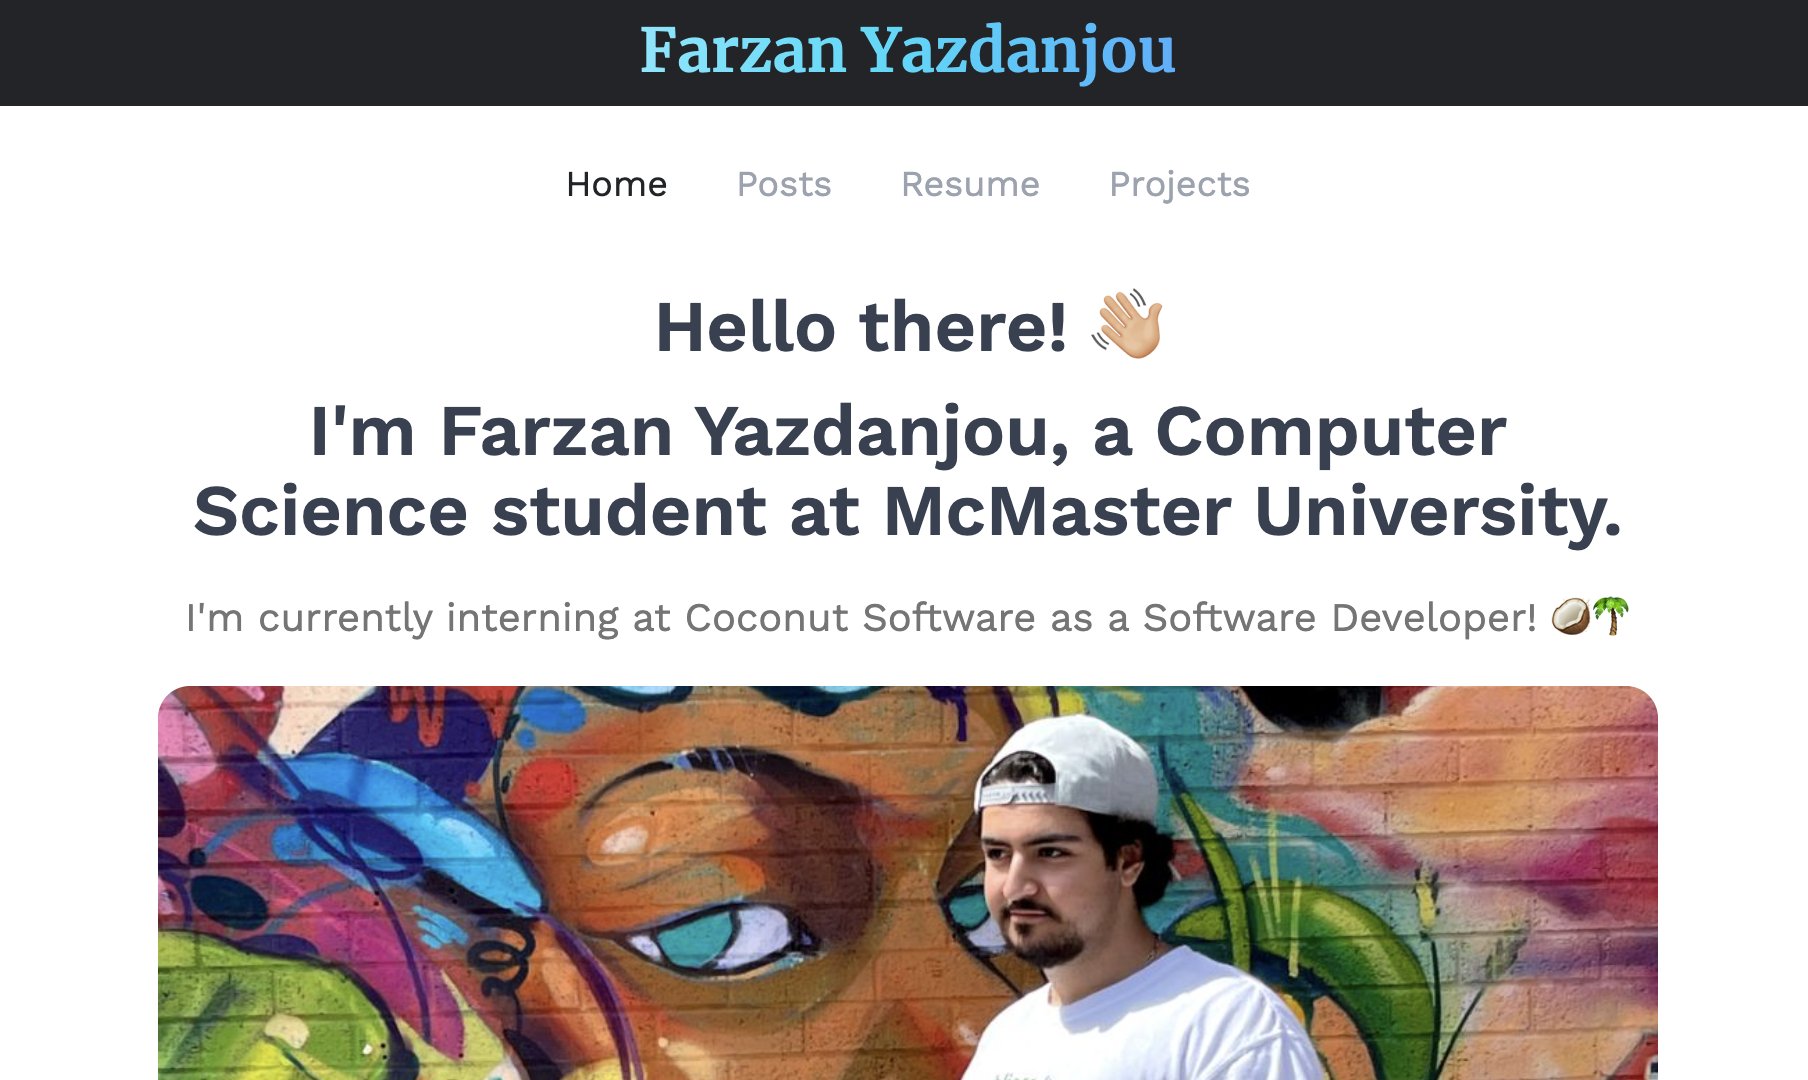
At this point, you may be done! 🎉 Once your website has deployed, you can try connected to your application by pasting the site's public IP in your browser. In the video version of this tutorial, we hit an error screen doing this - oops. The error read "Vite manifest not found ...". This tells us that npm was not installed correctly - so we added the following lines at the bottom of the site's deploy script. Make sure to hit update on the script before deploying again.
npm install
npm run build
rm -rf node_modules
Don't forget to add any other necessary commands to your deploy script. In my case, my application also requires php artisan storage:link. With these changes, the next deploy was a success and the application was up!
Forge Setup: Accessing your Database
With your server and site set up, it's time to access your database locally and modify the tables when needed. In this tutorial, we'll be using TablePlus as recommended by Forge itself. Firstly, we'll need to connect our Forge account with your SSH public key. To do this, head over to your account settings, and find the "SSH Keys" menu item. Give it a simple name like "Macbook" and paste in your local SSH public key. To find your public key, run the following command in your terminal.
cat ~/.ssh/id_rsa.pubIf you haven’t generated SSH keys on your computer, you can follow these instructions.
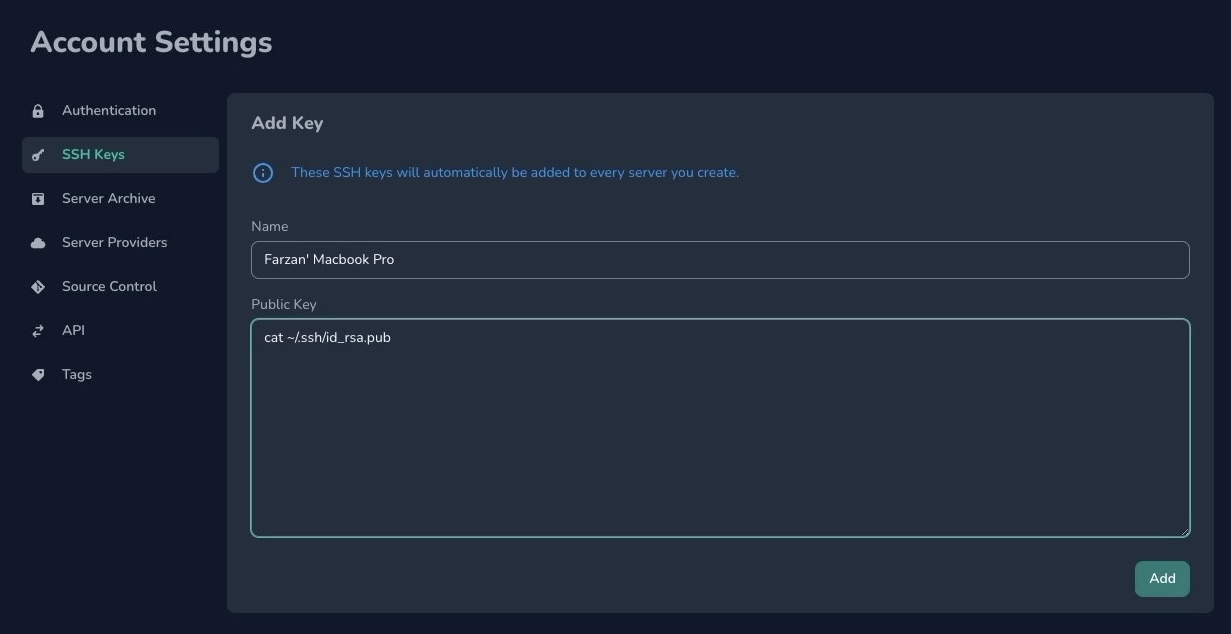
Once created, make sure that this key is connected to your newly-created server by clicking the "Add To Servers" button.

With your key set up, navigate to your server's dashboard to find the Database Connection URL. Copy this URL and switch over to TablePlus.
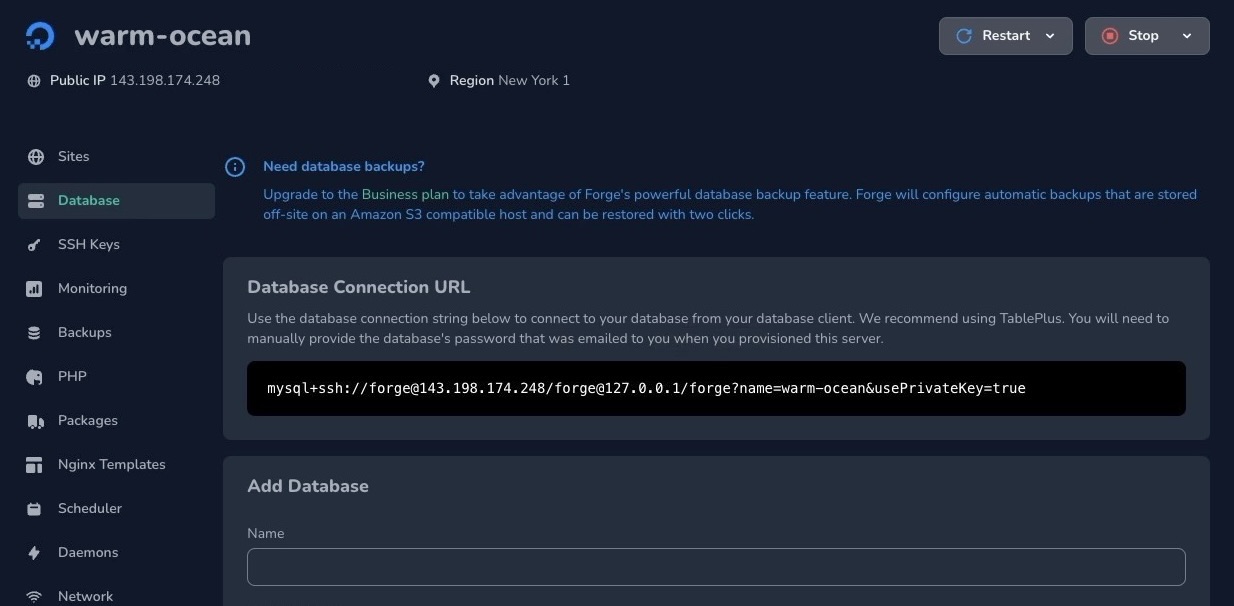
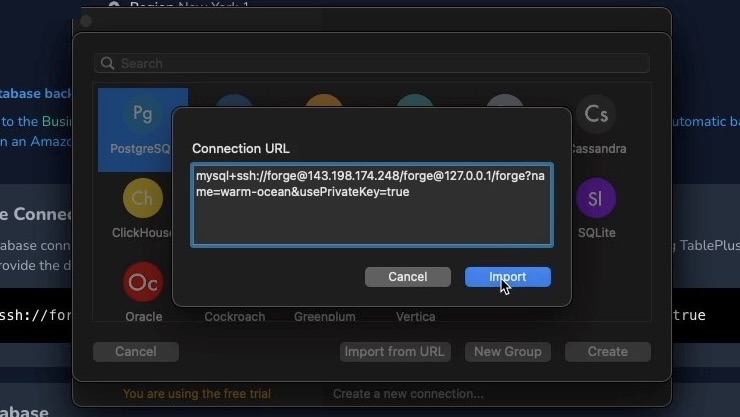
Create a new connection and select "Import from URL" - then simply paste in your connection URL and wait for TablePlus to fill in the connection details.
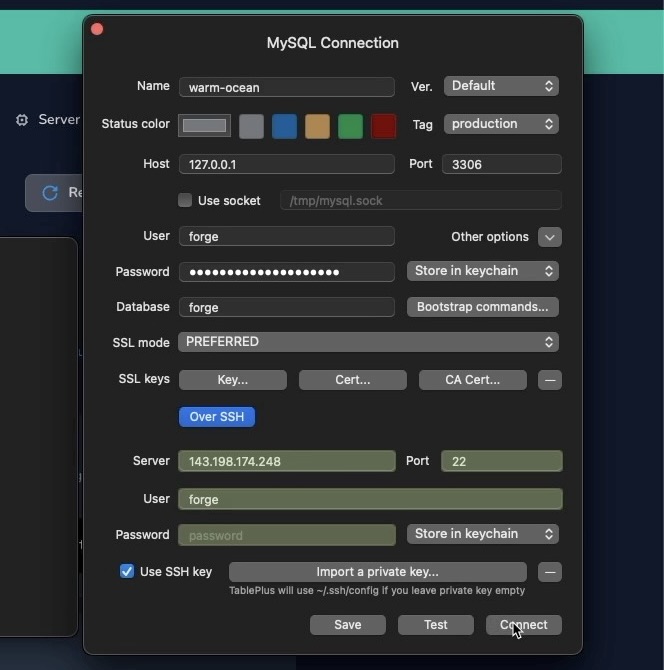
The upper "password" field is referring to the Database Password that Forge gave us when we were setting up the server. Once you fill in that field, you can test connection and use your local SSH password (usually your computer's password) when it asks for a "SSH private key password". If everything is green, you're good to go! Hit connect, and you will be able to select your database and view your tables from the cylinder icon at the top of the window.
Domain Setup
The last stage of setting up your own web application with Forge is to do some networking and set up your domain. We can connect DigitialOcean to our domain provider with their nameservers so we can handle the routing straight through DigitalOcean and keep our development environment small. The first step is to add the following nameservers to your domain provider's DNS settings.
ns1.digitalocean.com
ns2.digitalocean.com
ns3.digitalocean.com
From here, we can head back to DigitalOcean and navigate to the Networking page through the sidebar. Add your domain and follow the straightforward instructions. With the domain added, create the following A and CNAME records.
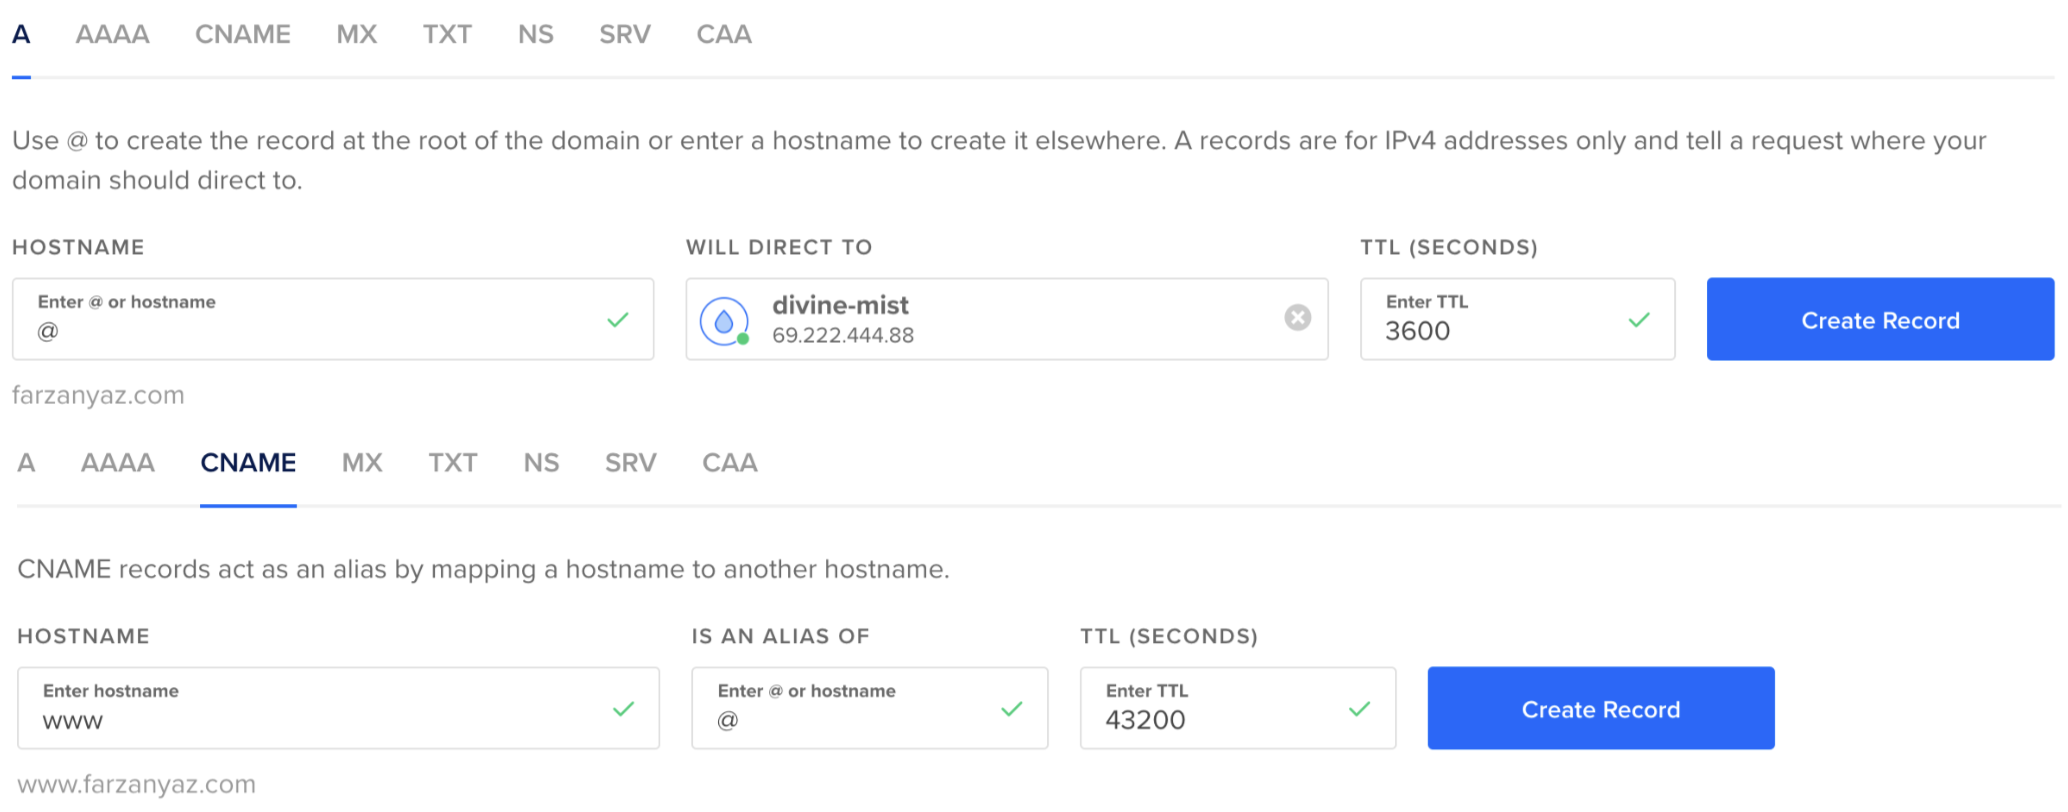
That's it! 🥳 Give it 24-48 hours for the DNS settings to be updated and then you can access your application through your domain! Or, you can give kproxy a try to access your website before that.
Conclusion
We're done already! ✨ In no time, we managed to set up a server, an accompanying database, a site, application installation, the deploy script, and a domain! I hope this article helped you and took away the intiidation that comes with hosting and deploying a web application! If you have any questions, don't hesitate to leave a comment on my YouTube video that covers the contents of this article.